
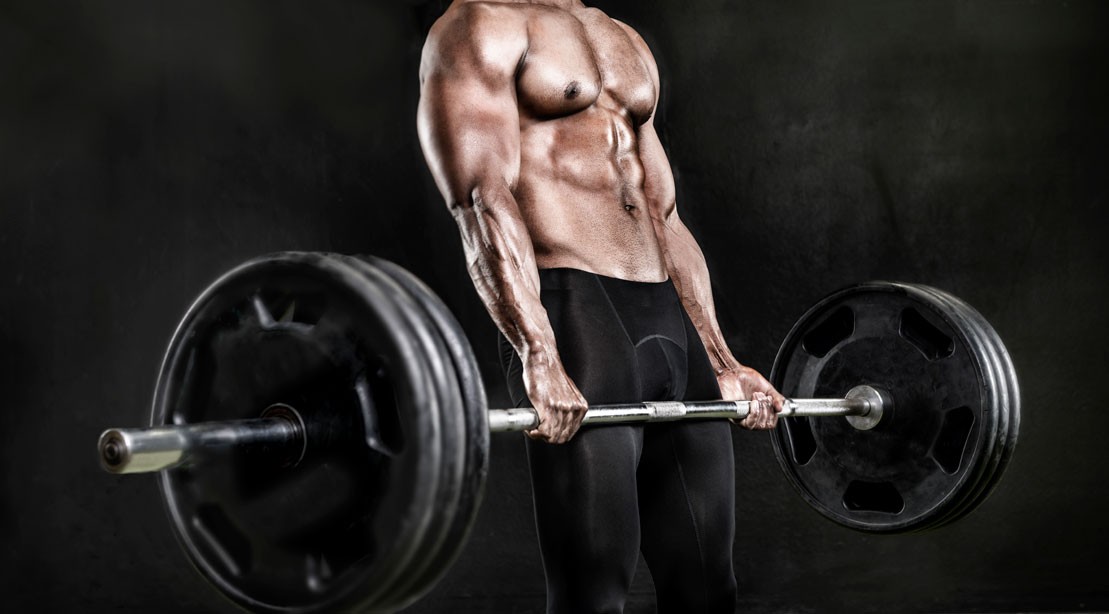
First off, I’m sorry to burst your bubble but this guide is not going to teach you how to steal stuff from the dead. In this web log, we’re going to discuss one of the most badass weight training exercises on the gym – the deadlift. This guide will also teach you how to optimize your deadlift technique with proper form and how to maximize your deadlift training.
What’s so great about the deadlift?
- It’s a full-body workout
- Relatively easy to learn
- Minimal equipment needed
- No spotters needed
- Strengthen core
- Bring the right posture and balance to your body
- Gives better mobility & power
- Trains the hell outta your grip
- Effective in building muscle to your posterior chain
- Builds and tests maximum strength
- Increase your hormones & libido
How to deadlift safely?
Here’s a 14-step checklist for a better deadlift form
- Feet jump-width apart, with bar cutting entire foot in half
- Bend over at waist (without dropping hips)
- Grab bar
- Pull yourself down to lower shins to bar
- Raise chest (without dropping hips)
- Raise butt up slightly (without raising lower back)
- Feel hamstrings tighten
- Grip tight, upper body tense
- Knees up
- Shoulders back
- Hips thrust into bar
- Put the bar down
- High-five yourself for doing a deadlift
- Repeat
However, it’s worth noting that there’s no one-size-fits-all deadlift technique because each person has individual biomechanics that will highly influence things like shin angle, back angle and hip height. We also have to factor in the muscle activation so it’s important to find a form that doesn’t hurt you and from that, you can add weight over time until your deadlift stalls.
A More Comprehensive Guide on How to Deadlift
The Setup & Execution
- Find your ideal stance width. This will be the position where your body generally feels the strongest and most comfortable for producing a lot of vertical force with a pretty close stance. As a general heuristic, the most ideal place to start is simply by performing a vertical jump, and noting what stance you naturally gravitate toward. There’s no one-size-fits-all prescription. Once you find your strongest stance width, the next factor you have to address is your toe angle. Naturally, your feet should end up about hip-width (8-12 inches) apart, and your feet slightly angled outwards (5-10 degrees). The bar should be over the middle of your feet.
- Grip the bar correctly. There are four options for gripping the barbell when you deadlift: double overhand, mixed grip, hook grip, and double overhand with straps. The double overhand grip is the classic way to hold the bar, with both of your palms facing you. This is the best grip to start when you’re a beginner. A mixed grip is an alternating grip—one hand uses overhand, the other uses underhand. This makes it harder for the barbel to roll out of your hands. However, you have to alternate the grips every set to prevent muscle imbalance. A hook grip is similar to the double overhand grip in that both palms will be facing you, but it’s made stronger by wrapping your thumb around the bar, trapping it between your other fingers. You could also use straps to help protect your hands, and make sure your grip won’t limit how hard you can train your back and hips.
- Breathe properly. With the deadlift, the biggest consideration is simply making sure you’re primarily taking a deep, diaphragmatic breath (breathing into your stomach/obliques) instead of breathing into your chest (relying more on your accessory respiratory muscles and not getting much torso expansion with your breath). Hold that deep, diaphragmatic breath throughout the lift. If you need to exhale and get a fresh breath, do it at the top of the lift or with the bar resting on the ground between reps. That will help you create more intraabdominal pressure, which will make the lift a bit safer by helping to support your spine.
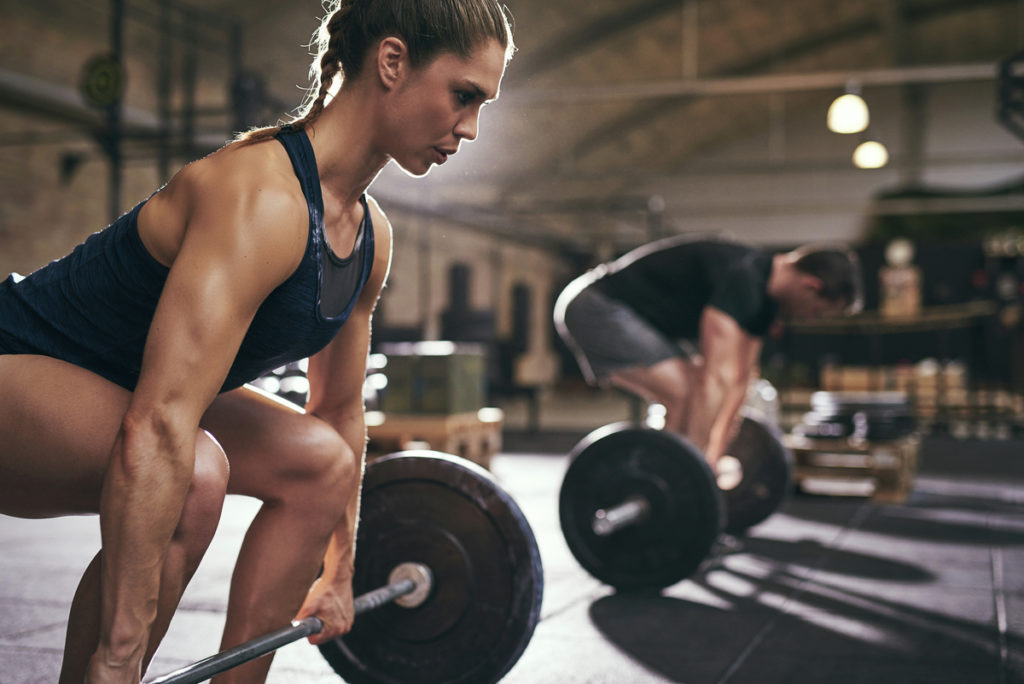
Deadlifting with proper form
- Approach the bar and set your feet. All of your weight should be on your heels and midfoot. The bar should be an inch or two off your shins, roughly over your shoelaces.
- Bend over and grab the bar by pushing your hips back with only a very slight bend in your knees, and your spine flexed. You should feel a lot of tension in your hamstrings. During the movement, your entire body should move upwards at the same speed. This means that your butt should not rise faster than your chest, or vice versa.
- Take your deep, diaphragmatic breath and tense your core.
- Your arms should stay straight the entire time. They are just there to hold onto the bar – they are not bending or pulling at all. Your legs and core are doing all the work.
- The bar should stay in contact with your body the entire time – you will literally be dragging it up your thighs. This is why you see many powerlifters with chalk or baby powder covering their legs (and why they typically wear socks that cover their shins, to prevent cuts and scrapes). Do not let it come forward. If you were to draw a line that follows the bar’s path from the floor to lockout, it should be a straight, vertical line.
- As you are pulling, you should be squeezing your glutes like you’re pinching a penny between your…well, you know. Once the bar passes your knees, think of getting your hips under the bar by squeezing your glutes. So while you’re pulling with your arms, you’re pushing through the floor with your feet, pushing your butt under the bar.
- At the top of the movement, you should be standing tall and proud with your chest open, like if you were King Kong getting ready to pound his chest.
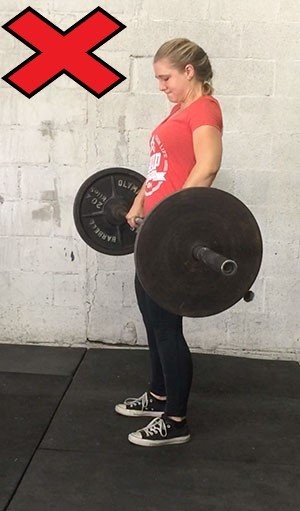
- At the top, do not hyperextend and lean back. You want to keep your spine neutral and everything tight.
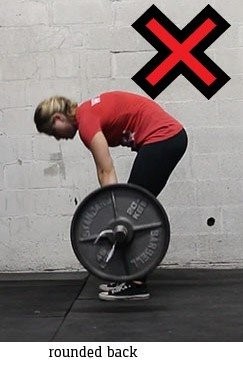
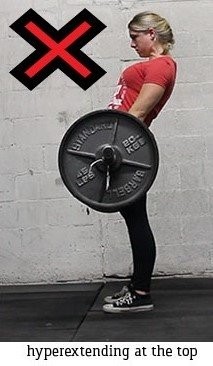
Common Faults & Mistakes while Deadlifting
- Arched Back – During the lift, the back should be flat and the spine neutral. If your back is excessively arched and rounded, the load may be lifted awkwardly, putting stress and pressure on the back which may cause injury.
- Looking up (with your neck) – Along with arching your back, hyper extending your neck to look up is also a big no-no.

- Hyperextending at the end of the movement – The spine should still be in neutral even at the top. Hyper extending at the top is actually not something we actually strive for or need to do.
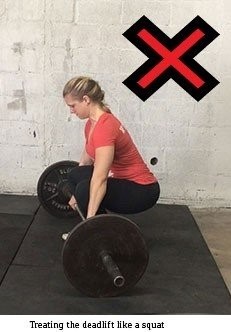
- Treating the deadlift like a squat with the bar in your hands. The objective of a deadlift is to hinge the hips. The knees will be slightly bent in the setup phase, but should not bend so deeply as to form a squat.
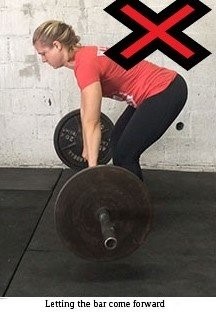
- Letting the bar come forward – The bar needs to stay over your midline and be dragged up your body the entire lift – any movement forward of your midline should be avoided.
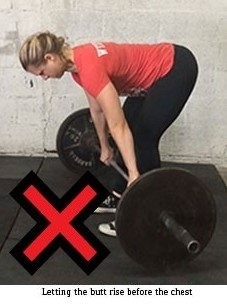
- Butt rises faster than your chest (also known as the “stripper deadlift”) – your chest should lead the movement, and your entire body should move upward at the same pace.
- Bending your arms – your arms should stay straight. Don’t bend your elbows to try to get the bar up faster as this will disengage the back muscles that stabilize the spine
If your goal is to develop supreme strength and total body power, deadlift should be at the core of your training. Our challenge to you is to take the information in this guide and use it to master your deadlift technique and rev up your strength. The better your technique, the faster your gains will be and the lower your injury risk will be.
You may also want to read: Strength Training: How Much Weights Should I Be Lifting
Comments
0 comments
Muchas gracias. ?Como puedo iniciar sesion?
Hi! I love how informative and great your articles are. Can you recommend any other Transitions Counseling blogs that go over the same topics? Thanks a lot!